Mold in indoor air is detected through professional air sampling ($150-$300 for basic testing) or DIY petri dish kits ($30-$80). However, identifying and eliminating the source is required to fix the problem - the most common source in Austin homes is the HVAC system, particularly the evaporator coil and plenum where condensation and organic debris accumulate.
Warning Signs That Mold Is in Your Indoor Air
The most reliable early warning sign is a musty, earthy odor that is particularly strong in the first minute or two after the air conditioning turns on. This timing is diagnostic: the initial blower startup disturbs settled mold colonies on the coil and in the near-duct areas, releasing a concentrated burst of spores and VOCs (volatile organic compounds produced by mold metabolism). As the system runs and airflow normalizes, the smell often fades - leading homeowners to dismiss it as 'just how the house smells when the AC starts.' It is not. It is a reliable indicator of mold on or near the air handler.
Respiratory symptoms that improve when you leave the home or open windows are a second major warning sign. The pattern: waking up with a stuffy nose that clears by mid-morning after you have been outside; or noticing that a persistent cough you have had for months disappears when you spend a week away from home on vacation. Indoor-specific symptoms - those that improve with any ventilation route that bypasses the HVAC system - point strongly to an indoor air quality source rather than seasonal outdoor allergens.
Dark residue or discoloration around supply vent registers is a visible surface indicator. Mold particles carried in the airstream deposit on the register frame and louvers, creating dark rings or irregular dark spots around and on the register. This is particularly visible on white painted registers in Austin homes where the AC runs heavily - the contrast between the deposit color and the white paint makes it unmistakable. Any dark residue around registers that cannot be explained by ordinary dust warrants a full HVAC inspection.
DIY Mold Detection Methods
Petri dish air sampling kits ($30-$80) are the most accessible DIY testing method. They contain a prepared growth medium in a dish - you open the dish, leave it exposed to room air for a set period (typically 1 hour), then seal and incubate it for 48-72 hours. Mold spores that land on the medium grow into visible colonies. The number and color of colonies gives a rough indication of mold levels. The major limitation: these kits detect mold presence but cannot identify species, quantify concentration accurately, or compare indoor vs outdoor baseline levels, which is necessary to determine whether indoor levels are abnormally elevated.
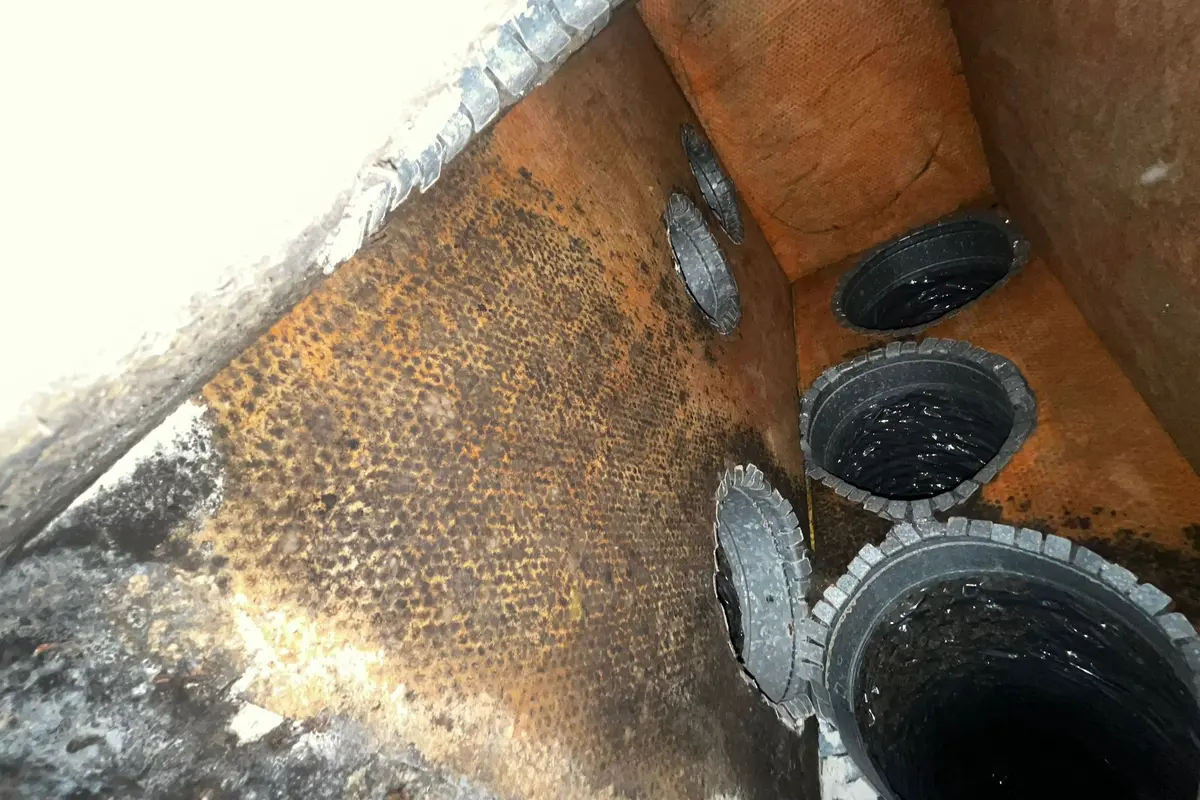
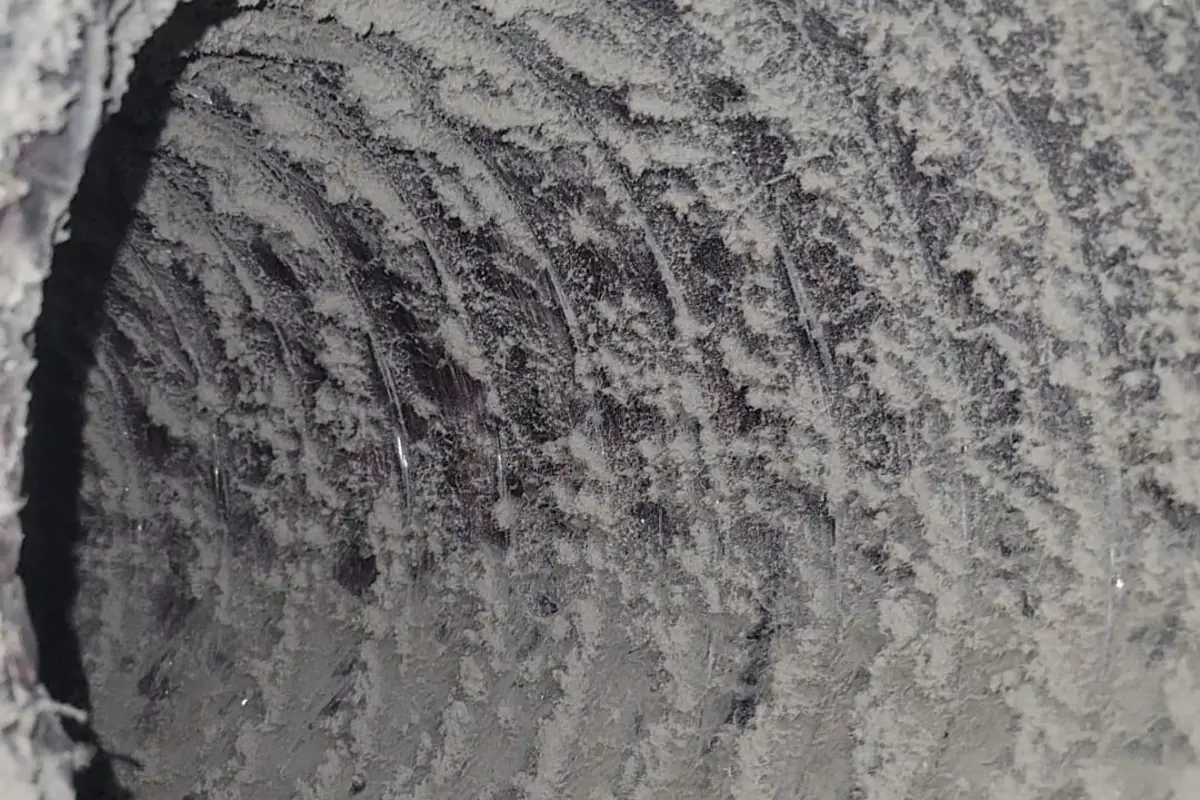
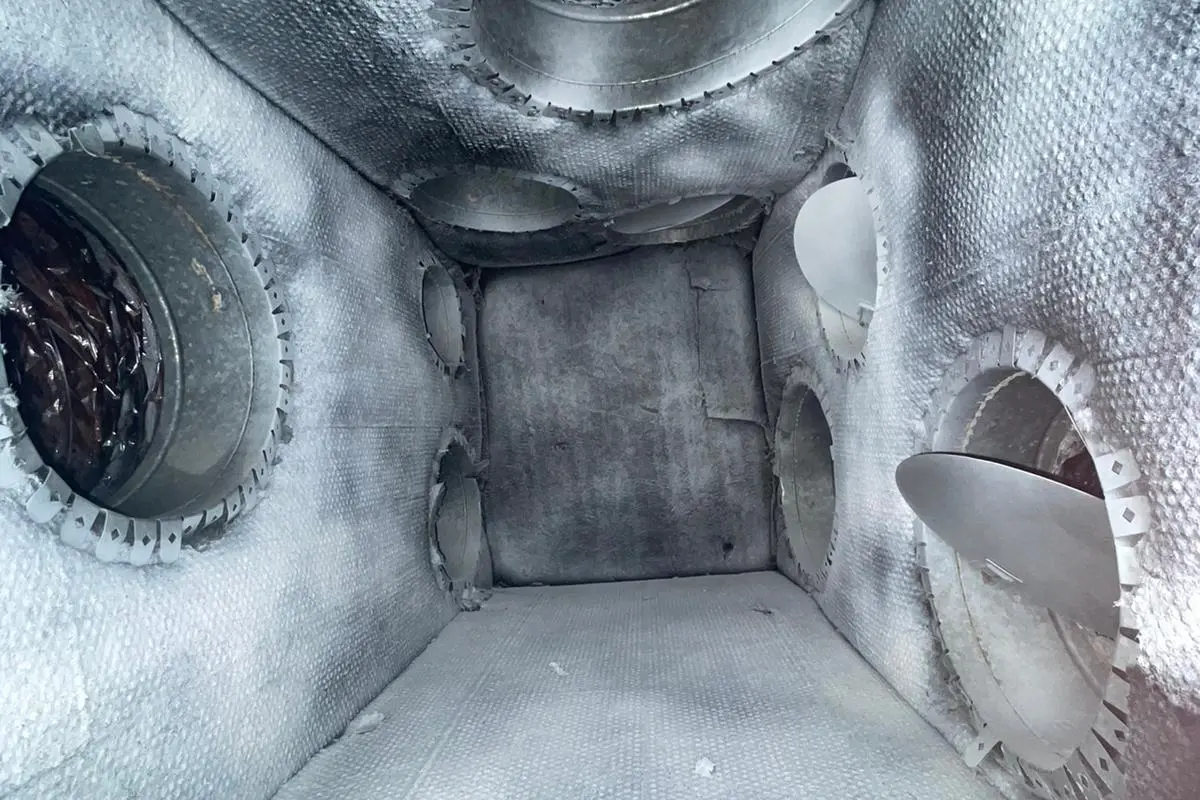
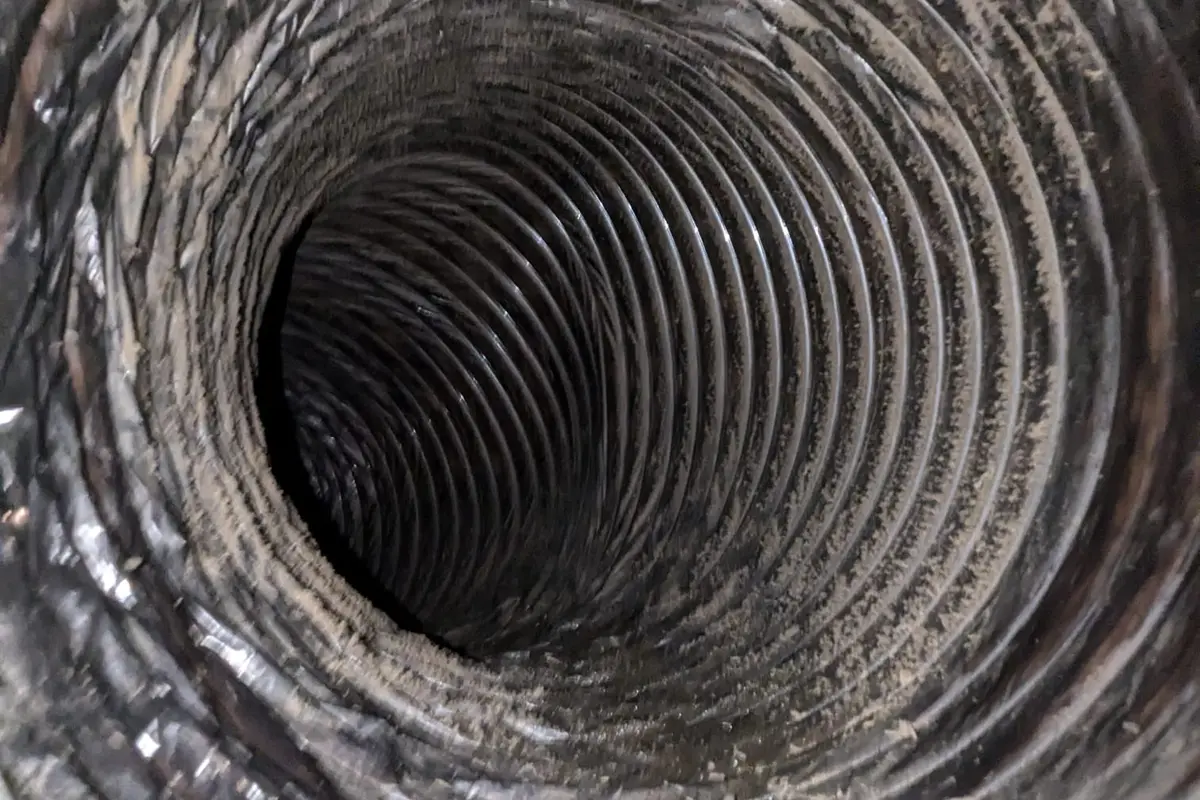
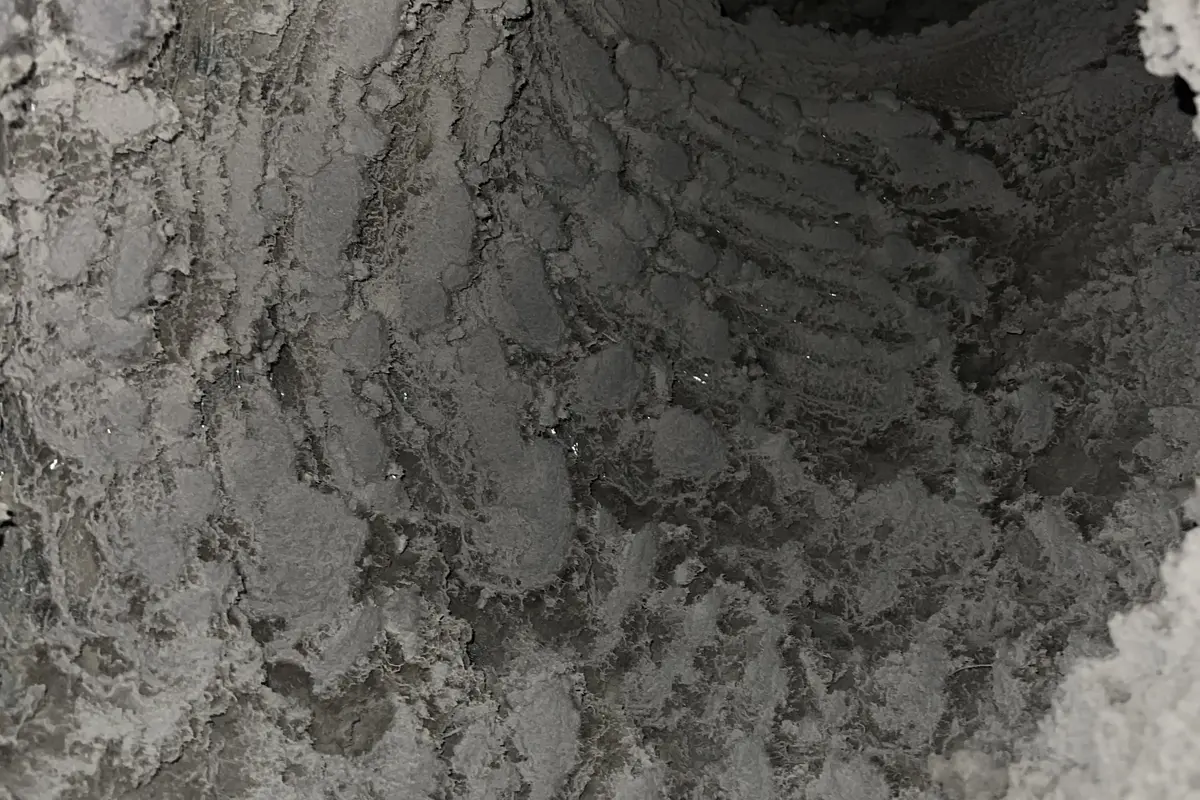
Visual inspection of accessible HVAC components provides useful information without any testing equipment. With the system off, remove the return air filter and shine a flashlight through the filter slot toward the coil. Visible dark coating on the coil fins - particularly a uniform gray-green or black layer rather than the gray of ordinary dust - indicates mold growth. Remove supply vent covers and look inside the accessible duct section with a flashlight: discoloration on duct walls, visible dark spots on the inner liner of flex duct, or dark residue at duct collar connections all warrant professional inspection.
The limitation of DIY detection for HVAC-source mold is access. The evaporator coil, plenum, and interior duct surfaces beyond the first few feet of each branch cannot be inspected without professional equipment. The areas most prone to mold growth are precisely the areas least accessible to a homeowner with a flashlight. DIY methods can confirm a suspicion that warrants professional investigation - they are not reliable enough to confirm that mold is absent when no obvious signs are visible.
Professional Air Quality Testing
Professional air quality testing for mold is performed by industrial hygienists (IH), indoor environmental professionals (IEP), or certified mold inspectors. The standard testing method uses spore trap cassettes - small air sampling devices that draw a precise volume of air through a sticky collection medium, capturing any spores present. The cassette is sent to an accredited laboratory for analysis under microscopy, which provides spore counts by species.
The American Industrial Hygiene Association (AIHA) and EPA both emphasize that indoor spore counts must be compared to a simultaneous outdoor sample to be meaningful. Mold is present in all outdoor air - the question is whether indoor levels are elevated above the outdoor baseline and whether species present indoors are absent or rare outdoors (indicating a specific indoor source). A single indoor sample with no outdoor comparison cannot determine whether indoor mold levels are abnormal.
Professional testing costs $150-$600 depending on the number of samples and the laboratory used. Basic testing (two samples: one indoor, one outdoor control) runs $150-$300 for the sampling and $50-$150 for lab analysis. More comprehensive testing adds samples from specific suspect areas (inside HVAC air handler, individual rooms, crawl spaces) and costs $300-$600 for the full assessment. Testing is worth the investment when: you need documentation for insurance or real estate purposes, symptoms are severe and other sources have been ruled out, or you are confirming clearance after professional remediation.

Why the HVAC System Is the Most Likely Source in Austin
Austin homeowners run their air conditioning for approximately 270 days per year - roughly 9 months of closed-window operation with all indoor air filtered through the HVAC system. In this context, the HVAC system is not just a delivery mechanism for contamination; it is the primary venue where contamination concentrates and amplifies. Every mold spore that enters through infiltration, every organic particle from indoor activities, and every fragment of biological material that bypasses the air filter deposits somewhere in the duct system.
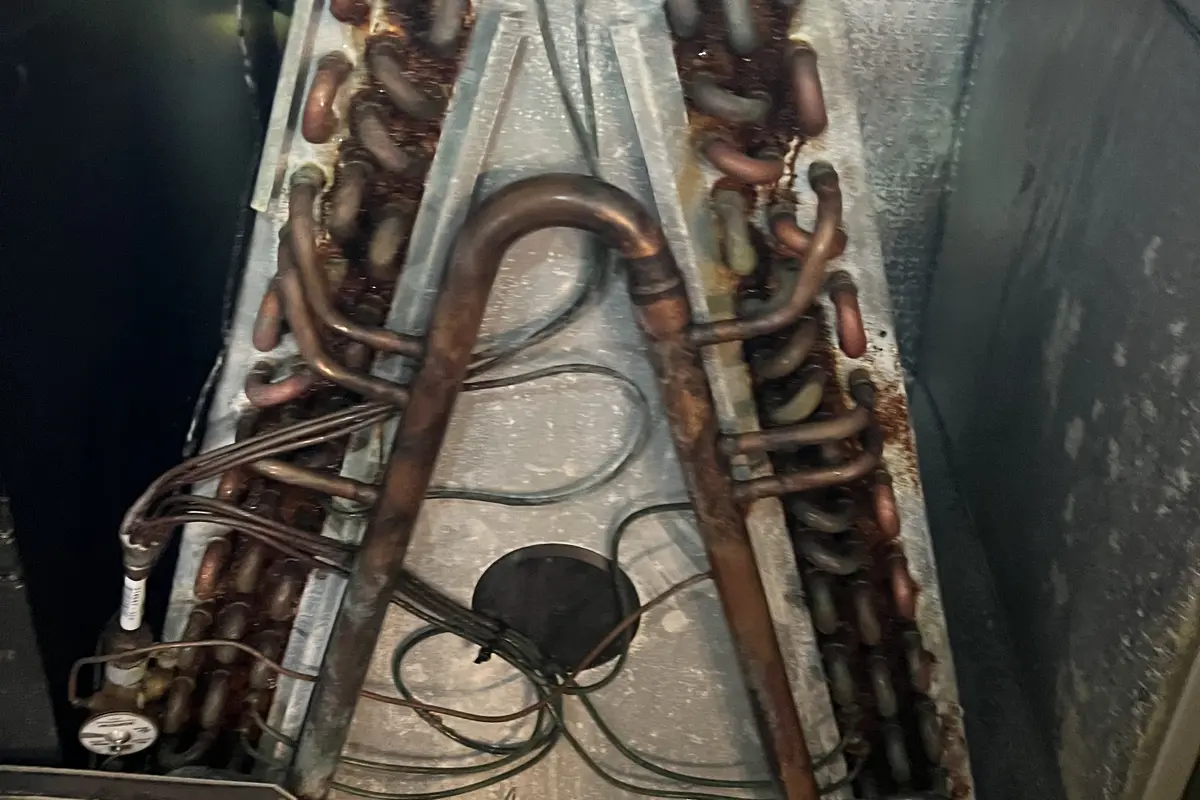
The evaporator coil and plenum represent the highest-risk locations because they combine the three conditions that maximize mold growth: persistent moisture (condensation on the coil surface every cycle), organic nutrient material (pollen, dust, biological debris accumulated over years), and darkness (no UV light to provide even minimal natural sterilization). The EPA's characterization that HVAC systems can be 2-5 times more polluted than outdoor air applies directly to the coil environment in an Austin home that has not been inspected in 5+ years.
The HVAC system's contamination advantage over other indoor mold sources is distribution. A mold colony in a bathroom wall affects that room primarily. A mold colony on the evaporator coil distributes spores to every room with supply vents simultaneously, every time the blower runs. This is why HVAC mold tends to produce whole-home symptoms (everyone in the household affected, symptoms consistent across rooms) rather than the localized symptoms associated with surface mold in a specific area.
5 HVAC Spots to Check Visually First
Supply vent registers: Remove the register cover and look at the duct collar and the first 12 inches of the branch duct. The transition from the register cover to the duct is where mold-carrying airflow slows and particles deposit most readily. Dark discoloration on the duct collar or inside duct wall surface is a direct indicator. Clean supply registers that show dark residue reappearing within weeks of cleaning confirm an active source upstream.
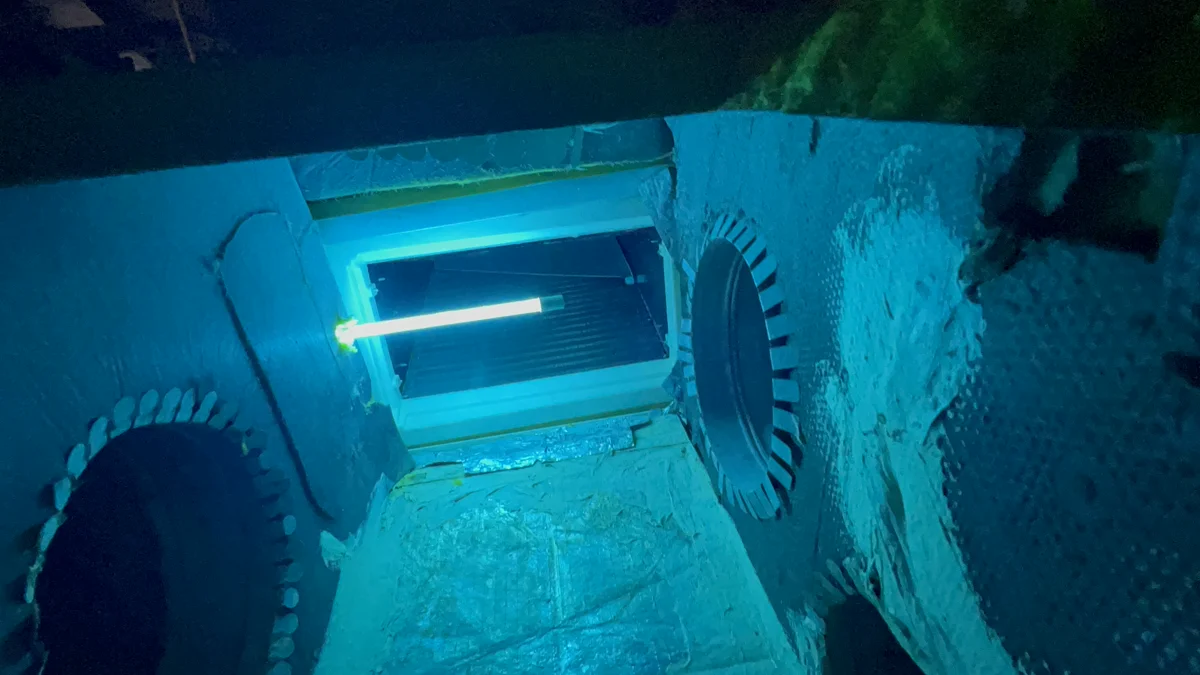
Air handler access panel and coil surface: Turn off the system, locate the air handler access panel (the removable front panel on the air handler cabinet), remove it, and shine a light toward the coil. Healthy coil fins are silver-gray with ordinary dust. A uniform dark coating, particularly with a green or black tint, indicates mold colonization. This inspection takes 5 minutes and is the most direct way to confirm or rule out coil mold without professional equipment.
Drain pan: With the air handler access panel off, look down below the coil for the condensate drain pan. It should be dry between operating cycles. Standing water of any depth in the pan is a problem - it means the drain line is partially blocked and standing water is actively supporting mold growth. Discoloration on the pan walls or a slick biofilm on the pan surface confirms ongoing mold growth. Return air grilles and flex duct collar connections are two additional easy checks - dark residue at these transitions is consistently correlated with upstream mold in the air handler.
Concerned About Your Home's Air?
We provide professional air quality assessments for Austin homes. See what is in your ducts before deciding.
Call (512) 601-4451Rate your home's indoor air quality in 2 minutes
When Professional Air Testing Is Worth the Cost
Professional air sampling is most clearly worth the investment in four situations. First, before and after professional mold remediation - pre-remediation testing establishes the contamination level and species; post-remediation clearance testing confirms the treatment was effective. Without clearance testing, you are relying on the remediator's assurance rather than independent measurement.
Second, for real estate transactions in Austin's active market. A buyer negotiating on a home with suspected mold, or a seller wanting to document clean air quality before listing, benefits from third-party professional testing. In Austin's competitive market, a clean air quality report is a valuable disclosure document that reduces buyer negotiation leverage on mold concerns.
Third, for persistent unexplained respiratory symptoms when other sources have been ruled out. If you have cleaned the HVAC system, addressed any visible surface mold, and symptoms persist, professional testing with species identification can point to specific mold genera that suggest remaining source locations. Some species (Stachybotrys, for example) require different investigation and remediation approaches than the common Cladosporium and Aspergillus found in most Austin HVAC systems.
Post-Detection: Remediation Steps in Order
Step one is moisture source identification and elimination before any cleaning. If the mold is growing because a condensate drain line is blocked and creating standing water, fixing that drain line is required before cleaning has lasting value. If humidity is chronically too high because the HVAC system is undersized or a whole-home dehumidifier is needed, addressing moisture is step one. Cleaning without fixing the moisture source results in regrowth within 6-12 months.
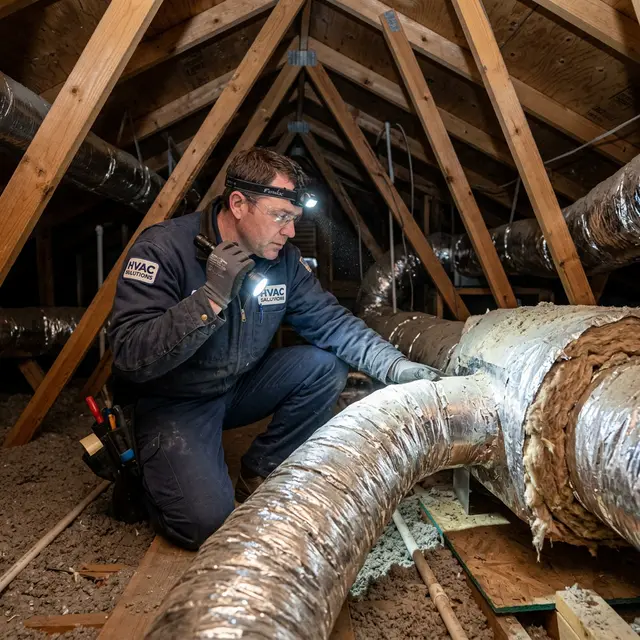
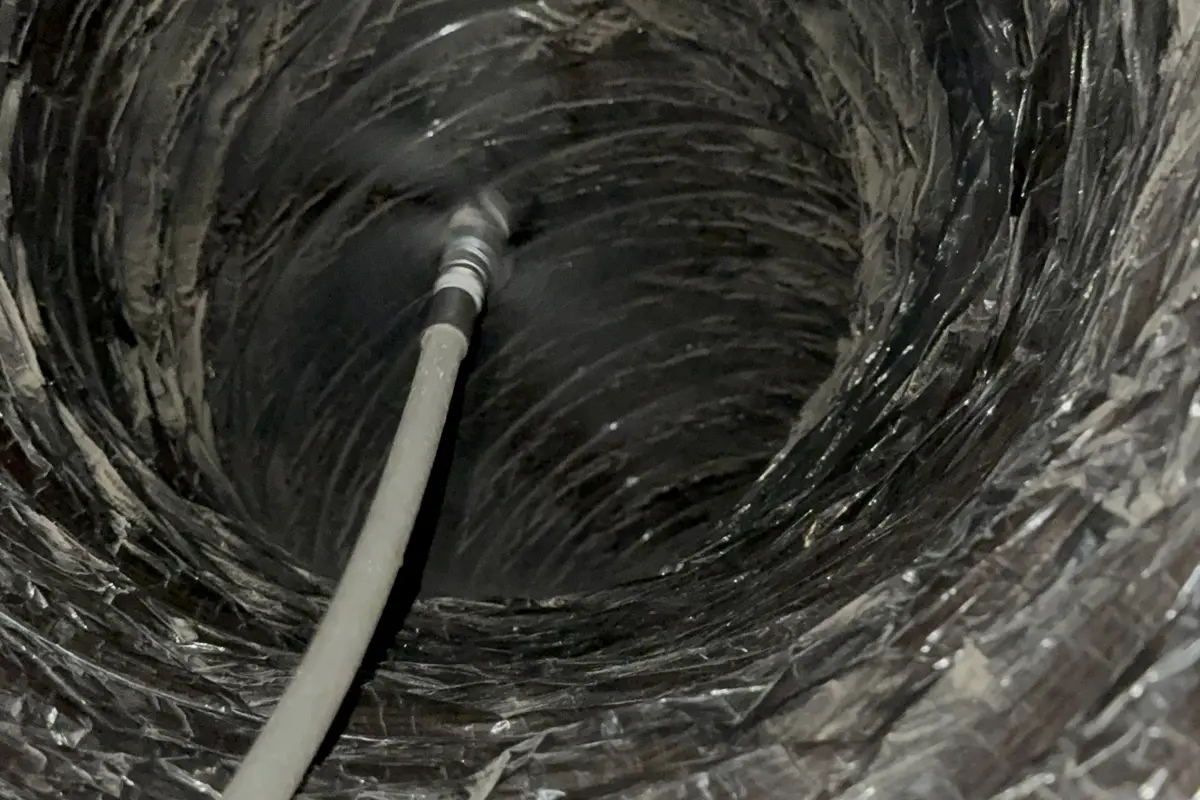
Step two is professional HEPA duct cleaning to remove mold-contaminated debris from duct surfaces and the air handler. This step removes the biological material that is currently being distributed through the home's air supply. It also removes the organic debris (pollen, dust, biological material) that would feed regrowth if moisture is not fully controlled. HEPA negative-pressure cleaning ensures captured material does not redistribute into living spaces.
Step three is UV-C light installation at the evaporator coil to prevent regrowth after the system is cleaned. Step four, if indicated, is professional air quality re-testing to confirm remediation was effective - particularly important for insurance claims, real estate transactions, or cases where symptoms were severe. The re-test establishes the post-treatment baseline and provides documentation that the source has been addressed.
Austin-Specific: When Mold Risk Is Highest
October is the highest-risk discovery month for Austin HVAC mold. The air conditioning system has just completed its hardest 5-month run of the year - June through September - during which peak humidity, peak condensation, and peak organic debris load all coincided. Any mold that found purchase on the coil or in the ductwork during that stretch is at its maximum extent by early October. An October HD camera inspection catches this at its worst before the system transitions to heating season.
Post-flooding inspection is required after any water intrusion event. Austin's flash flooding risk - particularly in neighborhoods like Barton Hills, Bouldin Creek, and lower-elevation areas in the Barton Creek watershed - means that after any flood or significant water intrusion, HVAC ductwork should be inspected for water damage and mold initiation. Flex duct that got wet does not dry adequately from normal air circulation; it holds moisture in the batting layer and grows mold within days of water contact.
Spring post-cedar season (March-April) is a second high-risk window - not for mold directly, but for the organic debris accumulation (cedar pollen, oak pollen) that feeds mold growth during the subsequent humid summer. An April inspection after a heavy cedar season positions you to start summer with clean ducts and minimal mold nutrient load, which meaningfully reduces the mold burden you accumulate through the summer. Call Air Central at (512) 601-4451 to schedule an HD camera inspection - we serve all of Greater Austin seven days a week with no extra charge for suburban travel.
Related Services
Learn more about our professional services related to this topic:
- Air Duct Cleaning - Remove dust, allergens, and debris from your entire HVAC system for cleaner indoor air.
- UV Lighting System - Eliminate bacteria and allergens inside your HVAC with UV-C light technology.
- Air Duct Inspection - Diagnose leaks, blockages, and efficiency issues with HD camera inspection.
Want the full picture?
Read our complete guide: Indoor Air Quality in Austin: The Complete Guide (2026) →Have questions about indoor air quality? Our team is available 7 days a week. Call us at (512) 601-4451 or visit our contact page.